Whew! This one was a long time in the making. I got the materials for the laptop bag probably a year ago (around the same time I got the materials for a still-unfinished dress. Heh.). In that time I've switched both my work laptop and personal laptop. Luckily I bought extra fabric so it was all good.
I started with the laptop tutorial from Habit of Art. The major thing I took from her was the perpendicular seam on the bottom of the bag to give it a rectangular bottom. I hemmed the top edge of the bag and sewed the handles to the bag.
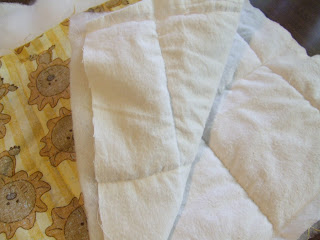
Since it was a laptop bag, I wanted it to have padding. I had leftover batting from a baby quilt, but I didn't want to sew lines onto the outer or lining layer of the bag. Instead, I used scrap material (hence the lions. Rawr!) to sandwich and secure the batting, then sewed it like I sewed the outer layer.
I also wanted a waterproof or water resistant layer. They sell it at your local fabric store, but I found this tutorial from Etsy on how to iron plastic bags together. Yes, plastic bags! The ones you always have a ton of but don't quite know which bin (recycling? garbage? grocery store bin?) to toss it in so you just collect them until you have a plastic bag monster. I ironed two rectangles and sewed it the same as the outer layer. I used regular old copy paper to sandwich the bags between, so I had to layer paper to make one large sheet. If you have sheets big enough (e.g. parchment or butcher paper) to cover the entire plastic sheet, that's way easier.

At this point I had three layers, all 22"x11.5" with a 2" wide bottom. Trim the triangle off from the perpendicular seam so the layers fit inside each other. They were layered and sewn to the outer layer. From the outside in: outer layer, waterproof layer, padding--order is important! You don't want the batting soaking up water.
I used Sweet Verbena's zipper lining tutorial. I first did the zipper pockets. Easy. Since the bottom of the bag was rectangular, I wanted the same for the top. Not as easy. My lining fabric was printed so I couldn't just attach the zipper at the top and fold over, since the back of the fabric would show. I ended up using scrap white fabric and made two borders on the top of the lining, then attached the zipper to the borders.
It took me about a week and lot of that week was figuring out how to incorporate all the layers. I had a slight mishap when I accidentally sewed the two lining pieces together at the pocket. Oops. Seam rippers are the best!
By the end it was really difficult to get all the layers through my sewing machine. The most difficult part was the lining, since it was the last to go on. "Next time" I would probably give myself more allowance in the height of the bag so I could attach the lining above the padding and waterproof layers and give my sewing machine a break.


No comments:
Post a Comment